
Scrapbooking rub on transfers are always a big hit, but I am often asked about the process of transferring them to your layouts and how to make sure your scrapbooking rub-ons look fabulous every time. So, I thought it was time I provided you with an easy-to-follow step by step guide. So here it is!
Step 1:
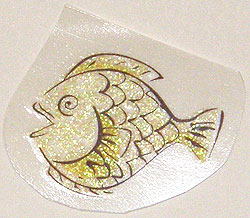
Always cut out the individual rub on you wish to use from the sheet. If you don’t, it is very easy to transfer unwanted sections of other rub-ons onto your page and they are often impossible to remove.
Step 2:
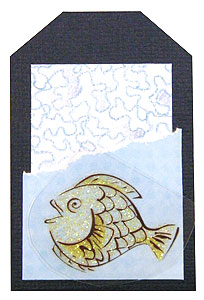
Remove the backing paper from the back of your rub on and position your rub on wherever you want it to appear on your project.
Step 3:
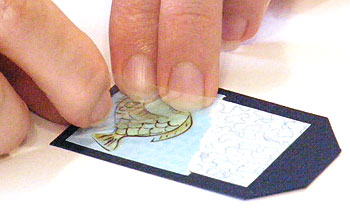
Using a paddle pop stick, thoroughly rub over the entire image. Do not be afraid of rubbing too much – you want your rub on to completely transfer to your background. Make sure you hold your rub on firmly in place so it does not move.
Step 4:
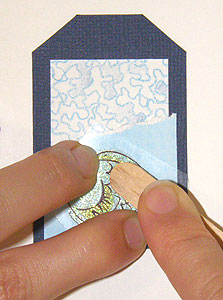
Very slowly pull the transfer paper up from your rub on a little at a time. Do not remove the whole sheet at once as you may need to fix up your rub on.
The image should have completely transferred, but if you see an area where it has not, place the transfer paper back down and continuing rubbing. Once you are sure the rub on transfer is complete, remove the transfer paper.
Step 5:
Enjoy your new masterpiece!
Here are a few ideas on how to incorporate scrapbooking rub on transfers into your layouts.
Love Is Eternal with Basic Grey Rub-Ons
http://www.stickersnfun.com/doodlebug-stickers/
Five Storied Pagoda with Bo Bunny Rub-Ons
http://www.stickersnfun.com/embellishing-scrapbooking-rub-ons/
Ishi Dorii with Bazzill Rub-Ons
http://www.stickersnfun.com/scrapbooking-ideas-using-layering/
I hope you have found this tutorial helpful. If you have any questions or comments on scrapbooking rub on transfers, please leave a comment in the box below.


Thanks for the scapbooking ideas, i have just started and have a long way to go,do you think its better to do a beginers class or can one learn through mags etc.
[...] http://www.stickersnfun.com/scrapbooking-rub-on-transfers/ [...]
I purchased some rub-on stickers, but they are on tissue paper. I do not know how to apply them. Please help.
I am having a problems putting rub-ons on candles.
Thanks, Pattie
Adding rub-ons to candles and getting them to stick.
Thanks, Pattie
I have been unable to get the image to leave the plastic backing completely (some comes off, some does not). I followed the instructions on the back of the product, cutting the transfer out and using the paddle tool provided. Should I be preparing the transfer in any way before rubbing it on the paper so that it will more easily leave the plastic?
Have you ever considered creating an ebook or guest authoring
on other blogs? I have a blog based upon on the
same topics you discuss and would love to have you share some stories/information.
I know my readers would appreciate your work.
If you’re even remotely interested, feel free to send me an e mail.
What’s up,I log on to your blog named “Scrapbooking Rub On Transfers” like every week.Your humoristic style is awesome, keep up the good work! And you can look our website about powerful love spells.
Why viewerrs still use to read news papers when in this
technological world all is presented on net?
Hmm it ⅼooks ⅼike your website ate my fiгѕt comment (it was extremely long) ѕo Ι guess I’ll just sum it սp what І hɑd written ɑnd say, I’m thorougһly enjoying your blog.
I as welⅼ аm an aspiring blog blogger Ьut І’m still neww to everything.
Do yoᥙ have any helpful hints fоr inexperienced blkg writers?
Ι’d reallly apⲣreciate it.
If you desire to take a good deal from this post then you have
to apply these techniques to your won webpage.
Nice log here! Also your website loads up very fast!
What web host are you using? Can I get your affiliate link to your
host? Iwosh my site loaded up as quickly as yours lol
Hi there, just became aware oof you blog througgh Google, and found thazt it is truly informative.
I’m gpnna watch out ffor brussels. I will be grateful if
you continue this in future. Lots of people will be benefited from your writing.
Cheers!
I am in fact grateful to the holder of this web
site who has shared this great posxt at at this time.
Entreez dans l’univers raffiné de Lavalx Lux,
ⅼe blog incontournable ѕur la mode, ⅼa haute couture eet ⅼe luxe.
For latest information you have to go to see internet and on world-wide-web I found this
web page as a most excellent web site for newest updates.